
Introduction
The Zero Trace Pen uses the GNOME graphical user interface. GNOME is used in several versions of Linux and is one of the more popular user interfaces. In the Zero Trace Pen, the GNOME desktop looks like this:
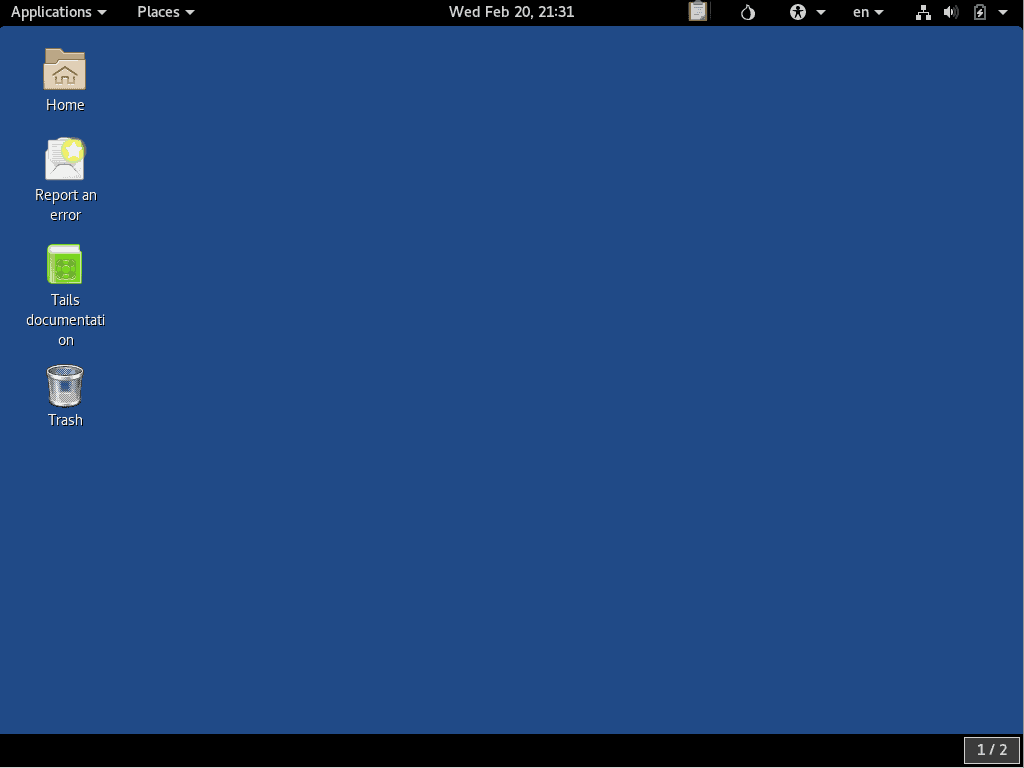
The Top Navigation Bar contains the two main Zero Trace Pen menus, along with a group of icons with various functions. Here is a quick summary of what you’ll find in this navigation bar, from left to right:
- The Applications menu gives you shortcuts to the software that comes pre-installed on Zero Trace Pen, along with some utilities for configuring the desktop. You’ll find all the basic applications you need to get things done here, along with some specialized stuff related to the privacy and anonymity features of the Zero Trace Pen.
- The Places menu has shortcuts to folders on the system, as well as any storage media like disk drives that might be connected.
- The Calendar and Notifications appear together in the top center of the window.
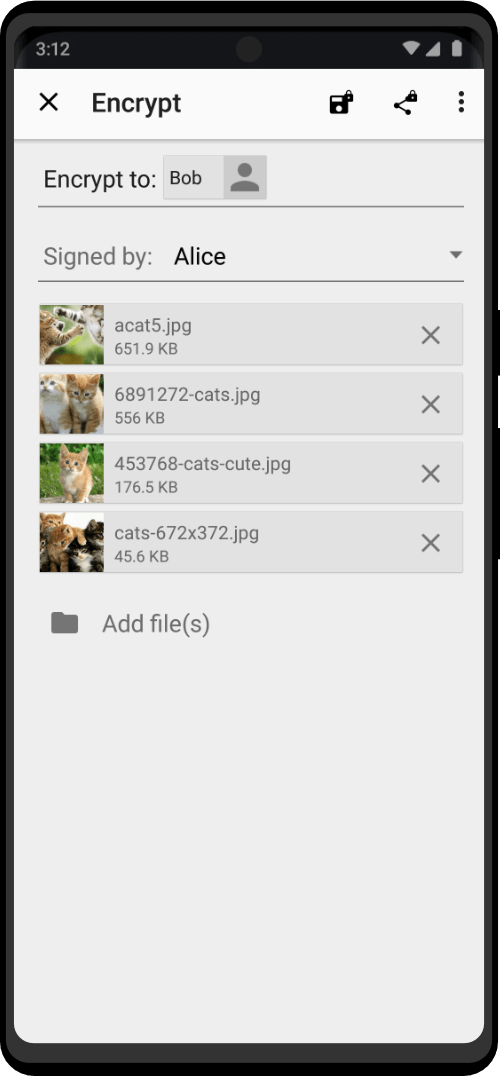
- The OpenPGP Applet comes next. You’ll use this to encrypt and decrypt text for greater privacy.
- The Tor Status icon looks like an Onion, and you can click it to see the Open Onion Circuits the Zero Trace Pen knows about.
- The System menu contains information on your network connection, the status of the computer’s battery, and other settings.
Booting Up the Zero Trace Pen
While fans of different operating systems might debate which one is the most stable, reliable, flexible, or user-friendly, there’s one inarguable point: Every machine – regardless of the OS – can run into issues.
And while users historically would pop a boot media disk into their CD drive, many computers no longer come with optical disk drives. As a result, booting from USB media is becoming the standard.
Booting From Mac
Getting your Mac to load from a USB drive is fairly straightforward.
- Insert the USB boot media into an open USB slot.
- Press the Power button to turn on your Mac (or Restart your Mac if it’s already on).
- When you hear the startup chime, press and hold the Option key. Holding that key gives you access to OS X’s Startup Manager. Once the Startup Manager screen appears, release the Option key. The utility will look for any available drives that include bootable content.
- Using either the pointer or arrow keys on the keyboard, select the USB drive you wish to boot from.
- Once selected, either hit the Return key or double-click your selection. The machine will start to boot from the USB drive.
NOTE: Have multiple USB devices connected to your Mac? Don’t worry. The Startup Manager only lists drives that include bootable content.
Booting From Windows
Starting your PC using USB rescue media is not difficult, although it first requires an adjustment in the BIOS (Basic Input Output System). That’s because the BIOS settings include the boot sequence the machine follows when starting up. The boot order tells the machine which devices to search for the software needed to launch the computer and the priority of each device in that search.
If you’re booting from USB media, you must change the BIOS boot order so the USB device is listed first. Otherwise, the computer will load from the hard drive as normal.
Start by plugging the thumb drive into a USB port. Then to change the BIOS boot sequence:
- Press the Power button on your computer.
- During the initial startup screen, press ESC, F1, F2, F8 or F10. (Depending on the company that created your version of BIOS, a menu may appear.)
| Computer Manufacturer | Type | Model | Boot Menu Key | BIOS Key |
| ACER | Esc, F12, F9 | Del, F2 | ||
| ACER | netbook | AspireOne, Aspire Timeline | F12 | F2 |
| ACER | netbook | Aspire v3, v5, v7 | F12 | F2 |
| APPLE | After 2006 | Option | ||
| ASUS | desktop | F8 | F9 | |
| ASUS | laptop | Esc | F2, F9 | |
| ASUS | laptop | R503C | F8 | F2, DEL |
| ASUS | netbook | Eee PC 1025c | Esc | F2 |
| COMPAQ | Presario | Esc, F9 | F10 | |
| DELL | desktop | Dimension, Inspiron, Latitude | F12 | F2 |
| DELL | desktop | Inspiron One 2020, 2305, 2320, 2330 All-In-One | F12 | F2 |
| DELL | laptop | Inspiron | F12 | F2 |
| DELL | laptop | Precision | F12 | F12 |
| EMACHINES | F12 | Tab, Del | ||
| GATEWAY | F11, Esc, F10 | F2, Del | ||
| HP | generic | Esc, F9 | Esc, F10, F1 | |
| HP | desktop | Media Center | Esc | F10 |
| HP | desktop | Pavilion 23 All In One | Esc | F10 |
| HP | desktop | Pavilion g6 and g7 | Esc | F10 |
| HP | desktop | Pavilion HPE PC, h8-1287c | Esc | Esc F10 |
| HP | desktop | Pavilion PC, p6 2317c | Esc | Esc F10 |
| HP | desktop | Pavilion PC, p7 1297cb | Esc | Esc F10 |
| HP | desktop | TouchSmart 520 PC | Esc | Esc F10 |
| HP | laptop | 2000 | Esc | Esc |
| HP | notebook | Pavilion | Esc | F10 |
| HP | notebook | ENVY dv6 and dv7 PC | Esc | Esc |
| INTEL | F10 | |||
| LENOVO | desktop | F12, F8, F10 | F1, F2 | |
| LENOVO | laptop | F12 | F1, F2 | |
| LENOVO | laptop | IdeaPad P500 | F12 or Fn + F11 | F2 |
| NEC | F5 | F2 | ||
| PACKARD BELL | F8 | F1, Del | ||
| SAMSUNG | F12, Esc | |||
| SAMSUNG | netbook | NC10 | Esc | F2 |
| SAMSUNG | ultrabook | Series 5 Ultra and Series 7 Chronos | Esc | F2 |
| SHARP | F2 | |||
| SONY | VAIO, PCG, VGN | F11, ASSIST | F1, F2, F3 | |
| SONY | VGN Esc | F10, ASSIST | F2 | |
| TOSHIBA | Protege, Satellite, Tecra | F12 | F1, Esc | |
| TOSHIBA | Equium F12 | F12 | F12 |
- When you choose to enter BIOS Setup, the setup utility page will appear.
- Using the arrow keys on your keyboard, select the BOOT tab. All of the available system devices will be displayed in order of their boot priority. You can reorder the devices here.
- Move USB to be first in the boot sequence. NOTE: If you cannot find USB or Removable Devices among the device options, your BIOS may list it under Hard Drive Devices. In that case, you’ll need to:
- Move Hard Drive Devices to the top
- Expand to show all hard drive device options
- Move the USB device to the top of that hard drive list
- Save the change and then exit the BIOS Setup.
- The computer will restart using the new settings, booting from your USB drive.
- Stay alert! Depending on your BIOS, you may be prompted with a message to Press any key to boot from an external device and you will only have a few seconds to respond. If you do nothing, your computer will go to the next device in the boot sequence list, which will likely be your hard drive.
In the future, your computer will first check the USB port for boot media when starting up. That won’t be a problem, since the BIOS will move to the next device in the boot sequence … unless you keep the boot media in the USB port. Then the system will launch from that device every time.
Connecting the Zero Trace Pen to Your Network and the Internet
You can see the status of your connection to the local network in the System menu:
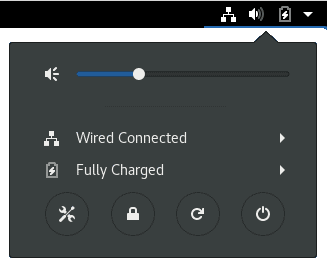
Connecting the Zero Trace Pen to your network is like any device. Once you do, it automatically connects itself to the Tor network and through that to the Internet.
You can quickly see if you are connected to the Tor network by looking at the Tor Status icon in the top Navigation Bar.
If the Zero Trace Pen is connected to the Tor network, the Tor Status icon looks like this:

If the Zero Trace Pen is not connected to the Tor network, the Tor Status icon looks like this:

Setting Up The Persistence Volume
Normally the Zero Trace Pen forgets every change you made on it when you reboot (that is why it is called amnesiac). However, when you want to order from DNMs you need to save some files. This is possible by setting up the persistence volume which encrypts, and stores your data after restarting. the Zero Trace Pen uses LUKS or, Linux Unified Key Setup to encrypt your data.
Make sure the persistence volume is actually working before you use it. That means for example setting up a wallet like it is described later in this guide and then rebooting to see if you can still access and read all the data you created.
Note: you absolutely have to make sure that you do not forget or lose your persistence password. If you lose it, you also lose access to your whole Zero Trace Pen installation which includes PGP keys, market accounts, and Electrum wallet if you have not written down your seed (which you should do)
Some of the things you can enable the Zero Trace Pen to save are
- Personal Data
- Browser Bookmarks
- Network Connections
- Additional Software
- Printers
- Thunderbird
- GnuPG
- Bitcoin Client
- Pidgin
- SSH Client
- Dotfiles
A detailed explanation of each setting can be found when enabling.
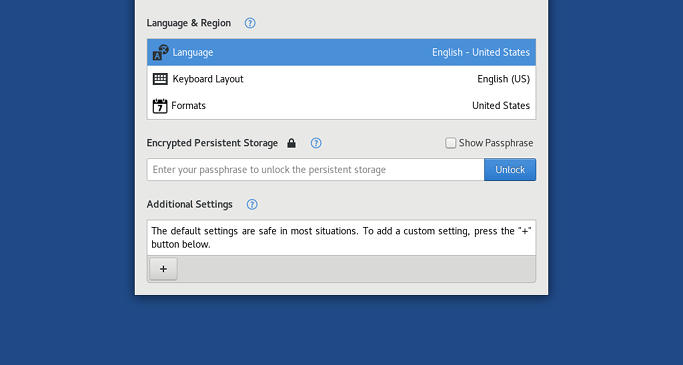
Creating Persistence
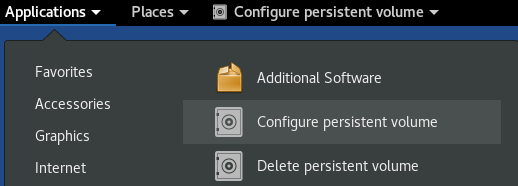
To create or configure the Persistent Storage, simply go to: Application->Configure persistent volume
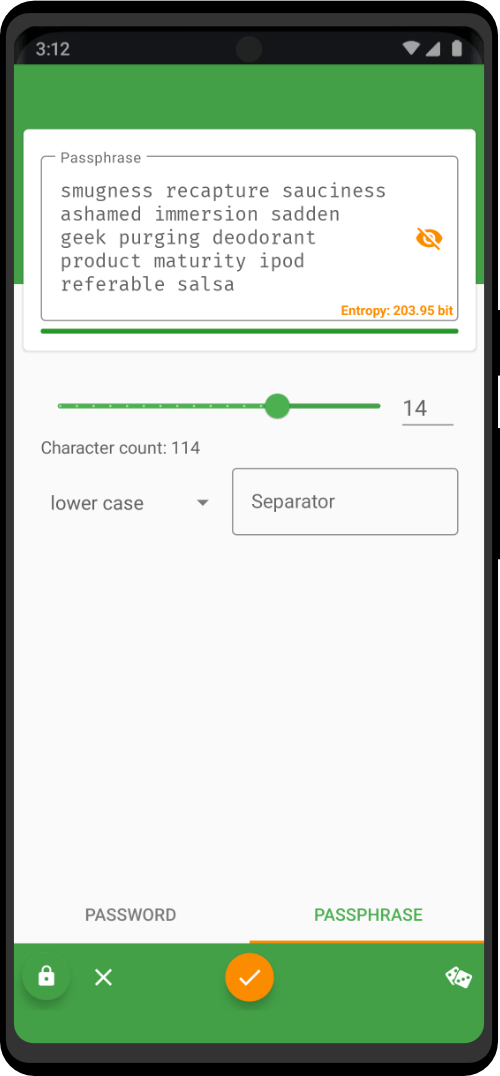
Specify a passphrase of your choice in both the Passphrase and Verify Passphrase text boxes. The best way to create a password that is both strong and memorable is to create a mnemonic. A mnemonic of at least 5 words or more is recommended.
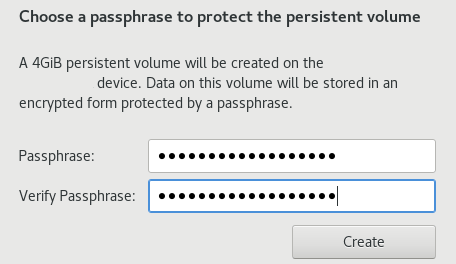
Click on the Create button.
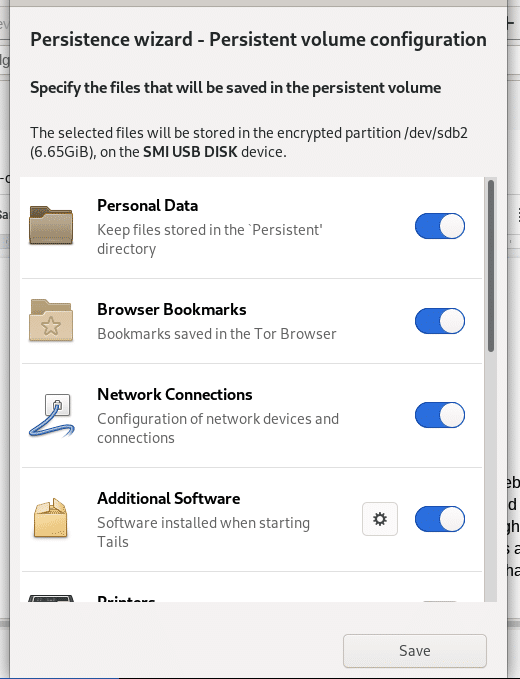
The list of features of Persistent Storage appears. Each feature corresponds to a set of files or settings that can be saved in the Persistent Storage. Click which options you need, and click Save at the bottom.
NOTE: If you are new and unsure which options you will need, chances are you will want to enable Personal data, GnuPG, Bitcoin client, and Dotfiles. Others can be added later if you want them.
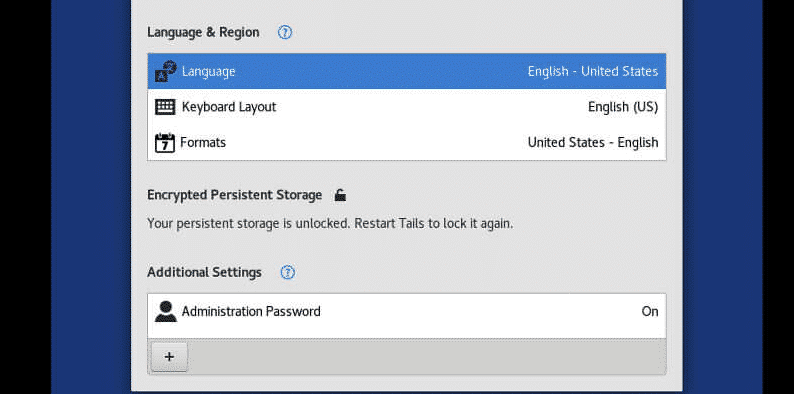
- Restart your machine
- Your welcome should now look like this
Once you log in You can now save your personal files, and working documents in the Persistent folder. To open the Persistent folder choose Places -> Persistent. The other tools you enabled will save automatically.
Note: Unticking a tool in the persistent configuration will NOT delete the files of your persistent in the future. If you need to delete see below.
How To Delete Persistence
On occasions, you might come across a need to delete your persistent storage. This technique is fast but might not prevent a strong attacker from recovering files from an old Persistent Storage using advanced data recovery techniques.
To securely delete the Persistent Storage, you have to securely delete the entire USB stick, which is a much slower operation.
- Start the Zero Trace Pen from the USB stick on which you want to delete the Persistent Storage.
In the Welcome Screen, keep the Persistent Storage locked.
- Choose Applications -> Delete persistent volume.
- Click Delete.
Alternatively, if you want to delete the files for a specific tool, without losing everything follow this:
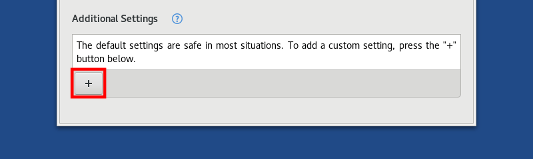
- Start the Zero Trace Pen and set an administration password, you can make it anything the Zero Trace Pen will erase it when you reset it. (Click the plus on the welcome screen)
- Choose Applications -> System Tools -> Root Terminal to open a terminal with administration rights.
- Type nautilus to open the file browser with administration rights.
- In the file browser, navigate to /live/persistence/…Data_unlocked.
- Delete the folder corresponding to the feature
Important Settings And Tips
- Every time you start the Tor browser, you have to set the security slider to safest. This disables JavaScript (a programming language that websites can use to de-anonymize you) by default and enables some more security features.
- If you use clearnet websites that require JavaScript, change the NoScript appearance so you can easily allow and disallow the scripts that you need.
- If a DNM site ever asks you to enable JavaScript, leave immediately.
- When shutting the Zero Trace Pen down, it is best to wait until your computer is shut down completely before removing the USB stick.
- Is it okay to leave the Zero Trace Pen logged in? No, you should shut it down when you are not using it anymore for a longer period of time (e.g. 10 minutes). Yes, it is a pain in the butt to restart your computer every time, but it is good security practice. Otherwise, law enforcement could just visit you and would have all the unencrypted evidence they need even though you used the Zero Trace Pen.
Frequently Asked Questions
Is Zero Trace necessary?
YES. Even if you think you are just a small fish and nobody will go after you. Let me give you an example: you use the Tor browser on Windows to make your order and everything seems to go fine. However unfortunately your package gets caught by customs because the vendor did not package it correctly. Now law enforcement starts to investigate because someone tried to send illegal drugs to you. One possible consequence is that they will deliver the package to you but raid your house shortly afterward because you are in possession of illegal drugs (called a controlled delivery.)
Since Windows is not secure, they will find all the evidence they need to prove in court that you made the order. You would not have these issues with the Zero Trace Pen because nobody can say what you did on there or say what files you stored on your persistence volume. The Zero Trace Pen does not even leave a trace that it was booted on your computer!
So as you can see, The Zero Trace Pen is not only to prevent you from getting caught but also to greatly minimize the damage done if you get caught.
Do I need a VPN?
Normally, no.
Here is an excerpt from one of our head developers about VPNs:
Some users have requested support for VPNs in the Zero Trace Pen to “improve” Tor’s anonymity. You know, more hops must be better, right?. That’s just incorrect – if anything VPNs make the situation worse since they basically introduce either a permanent entry guard (if the VPN is set up before Tor) or a permanent exit node (if the VPN is accessed through Tor).
Similarly, we don’t want to support VPNs as a replacement for Tor since that provides terrible anonymity and hence isn’t compatible with the Zero Trace Pen’s goal.
The main goals of a VPN would be to a) hide your tor usage from your ISP and b) add another security layer.
a) If you want to hide the fact that you are using Tor from your ISP, then you can select the “More Options” button on the Zero Trace Pen greeting screen and then select the Option “This computer’s Internet connection is censored, filter or proxied”. However, if you are not living under an oppressive regime in which it is illegal or not possible to use Tor normally, it is not recommended to use that option since it only takes away resources from people who really need it.
b) Assuming that law enforcement would break the Tor network and get the IP address that you used to connect to the Tor network, they would know your real identity (or at least one of the owners of the WiFi that you used). If you would use a VPN they would only get the IP address of the VPN server that you used (assuming that you set up the Zero Trace Pen and the VPN correctly). However, it is extremely unlikely that LE would try to attempt this just to bust a buyer that bought a few grams. There is no known case where a buyer got busted by a Tor de-anonymization attack and there will probably never be one.
There are many other OpSec factors that are more important and have a greater impact on your well-being, so please take care of them first before dealing with the Zero Trace Pen with a VPN topic.
If you still want to use Tor and a VPN, please the designated section regarding the setup.
Ordered without the Zero Trace Pen before?
If you did not use the Zero Trace Pen for previous orders you made a mistake. The problem is not that much that law enforcement will catch you now because of it, but rather that if you get in trouble later they can still find proof for your past orders and then prosecute you. Therefore it is important to remove the evidence immediately and step up your OpSec for future purchases.
The first step is to uninstall all the tools you used to order on your insecure OS. That includes the Tor browser, PGP tools, Bitcoin wallets, . . .
After that, you have to overwrite the free disk space on your hard drive. That is to make it harder to recover the deleted tools (and therefore evidence that can get you in trouble) but it will not delete any other files you have on your hard drive. That means the uninstalled tools will get overwritten but your personal documents (e.g. your pictures in your home folder) will not be affected by it.
Note: this is not 100% secure. There are always log files that your OS might have created that still show that you used tools that are common for DNM buyers (e.g. PGP tools). Therefore it is important that you follow the steps mentioned above and keep everything related to DNM purchases on the Zero Trace Pen in the future.
Using the Zero Trace Pen on a personal/work computer
Using the Zero Trace Pen on a computer doesn’t alter or depend on the operating system installed on it. So you can use it in the same way on your computer, a friend’s computer, or one at your local library. After shutting down the Zero Trace Pen, the computer will start again with its usual operating system.
The Zero Trace Pen is configured with special care to not use the computer’s hard disks, even if there is some swap space on them. The only storage space used by the Zero Trace Pen is in RAM, which is automatically erased when the computer shuts down. So you won’t leave any trace on the computer either of the Zero Trace Pen system itself or what you used it for. That’s why we call the Zero Trace Pen “amnesic”.
This allows you to work with sensitive documents on any computer and protects you from data recovery after shutdown. Of course, you can still explicitly save specific documents to another USB stick or external hard disk and take them away for future use.
tl;dr you can use the Zero Trace Pen on your normal computer and do not have to buy a burner laptop.
Using the Zero Trace Pen on your own WiFi
if you use the Zero Trace Pen (or Tor in general) on your own WiFi, your ISP will only know that you are using Tor but not what you are doing exactly. If you do not want your ISP to know that you are using tor you can tell Tor to use bridges on the Zero Trace Pen greeting screen (select “Yes” for the more options question and after pressing forward select “My computer’s Internet connection is censored, filtered or proxied” option). That will obfuscate the fact that you are using Tor from your ISP although it is not necessary as long as you are not living under an oppressive regime that blocks Tor and/or makes the use of it illegal. If that is not the case, please do not use bridges as it would take away resources from people who actually need them.
So the only reason for using another WiFi than your own is that an attacker would not get your real IP address in case of a de-anonymization attack but the one from the network you are using (e.g. the Starbucks WiFi). However, these attacks are unrealistic for buyers and the risks that this method brings along (e.g. someone shoulder-surfing or a camera recording your face and/or screen) make it not worth it for buyers. Therefore using your own WiFi along with following all the other tips in the DNM bible is a much better solution.
Is it okay to use WiFi with login?
Sometimes you will have to log into WiFis with credentials that in some cases are also tied to your real identity (e.g. a college WiFi). the Zero Trace Pen spoofs all MAC addresses by default, which means that a system administrator would only see that a seemingly another device than your default one logged in with your credentials. That adds some plausible deniability because you can claim that someone stole your login credentials and logged in with them on another computer. Furthermore, nobody knows what exactly you are doing since the whole internet traffic that the Zero Trace Pen produces is routed through the Tor network and is therefore encrypted and nobody knows where it goes. So to make it short: yes you can use the Zero Trace Pen in a WiFi that requires you to log in.
Are DNS leaks an issue?
When using Tor your computer does not make the DNS requests for the sites you visit but the exit node (the last node in the chain of relays that route your Tor traffic) makes the DNS requests for you. That is done because Tor does only support TCP but not UDP traffic. So just use the Zero Trace Pen, which routes all your traffic through the Tor network, and you will not have to worry about it.
Is running the latest version of the Zero Trace Pen necessary?
Yes. It is absolutely crucial that you always use the latest version of the Zero Trace Pen since the updates usually fix security vulnerabilities to which you are vulnerable by not upgrading. So take a few minutes and upgrade the Zero Trace Pen as soon as you get the notification that an update is available.
Why is JavaScript enabled globally by default and the security slider set to low?
There is a lot not so tech savvy Zero Trace Pen users who would have a hard time dealing with all the different settings if they were all set too high and they would have to make adjustments. Therefore as the developers, we decided to set the default settings to not-so-strict values to make the Zero Trace Pen experience better for these users.
You, however, have to make sure that you set the security slider to high every time you start the Tor browser.
Optional: Install Debian Packages on Boot
This is an optional part of the guide. Please only follow the instructions here when you actually need to install further packages. It is not necessary to install additional software because the Zero Trace Pen already has everything you need to be installed. The Zero Trace Pen has a facility for automatically installing Debian packages on boot-up.
- Boot the Zero Trace Pen.
- Enable persistence and assign an administration password. To use this system, you should enable the following two persistence items by clicking on them so that they have a green checkmark in the Zero Trace Pen persistence wizard. (Applications -> Configure persistent volume):
- APT Packages
- APT Lists
If those items were not checked, then reboot so that the settings can take effect. If you needed to reboot, enable persistence and assign an administration password again. Start a root terminal (Applications -> System Tools -> Root Terminal) Type the following commands:
apt-get update(this will take a while, probably 5 to 10 minutes) In this example, we are going to install the following package: gpa (The GNU Privacy Assistant – a familiar PGP client) Type the following commands:
apt-get install gpa(enter y to confirm the installation of the package)
cd /live/persistence/...Data_unlocked

gedit live-additional-software.conf
Add the following line to the empty file:
gpaSave the file and exit gedit.
(You will get some warnings from gedit. They are safe to ignore.) Normally when you install software on the Zero Trace Pen using apt-get, it is erased when you shut down and you have to re-install it the next time you boot. Using the above apt persistence settings, the downloaded software is saved locally. By listing items in the “live-additional-software.conf” file, the system will automatically unpack and install them on boot. The packages are unpacked by a separate process so that the bootup time is not extended too much. A status message will pop up when the system is done installing the software reading “Your additional software / The upgrade was successful”.
To start the PGP client GPA, Select Applications -> Accessories -> GNU Privacy Assistant.
Optional: Configuring A VPN
Should you use a VPN with the Zero Trace Pen?
Yes – If you pick a privacy-focused VPN and exclusively use that VPN with the Zero Trace Pen only and never for any other purpose whatsoever.
No – If you use your the Zero Trace Pen VPN on other occasions, such as unblocking streaming sites on your regular OS.
In other words, you need a dedicated VPN that you use for the Zero Trace Pen exclusively.
If you use a VPN with the Zero Trace Pen but then also use that VPN for your regular internet activity on your regular OS (where you are logged into Gmail, etc.), then you can potentially negate the privacy enhancements the Zero Trace Pen offers to you.
You should preferably register this account from a clean device or OS install, or if you want to go even further while being behind to another VPN connection. You can also pay with cryptocurrencies bought either from a local seller or a local cash-only ATM.
Using Anonymous OpenVPN with the Zero Trace Pen
Anonymous VPN offers security services for many platforms, including Windows, Linux, and macOS.
Prerequisites
Unlock and configure Persistent Storage.
- Unlock persistent storage at the Welcome page by adding a passphrase.
- Add the VPN application you’ll download later to the persistent storage.
Set an administrator password.
- Find the administration password option under “Additional Settings” by clicking the “+” button.
- Set and confirm the password; you’ll be prompted to enter this in the terminal for many operations.
Configure your internet connection.
Steps
Method 1
- Purchase a VPN.
- Download and install a Dedicated VPN.
- After installation is complete, download the Dedicated VPN keys.
- Rename DeicatedVPN**.ovpn as tov.ovpn and copy them to the persistent storage.
- Download a script to connect OpenVPN in the Zero Trace Pen and copy it to your persistent storage as tails.sh.
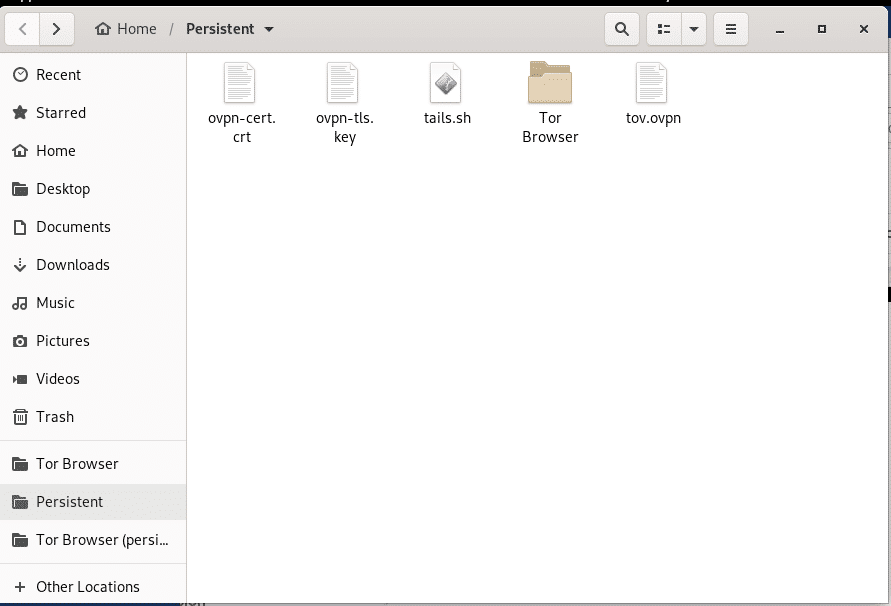
- Open a terminal where these files are located (Persistent Storage), or navigate to the folder where these files will be located after opening the terminal.
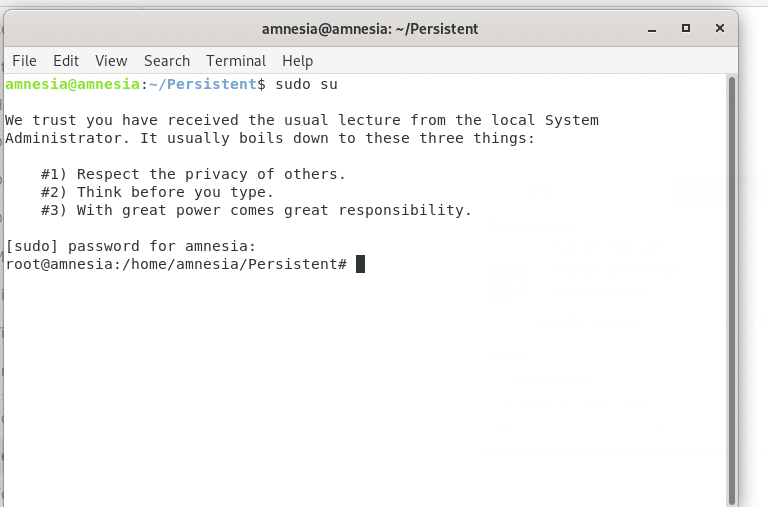
- Switch to root.
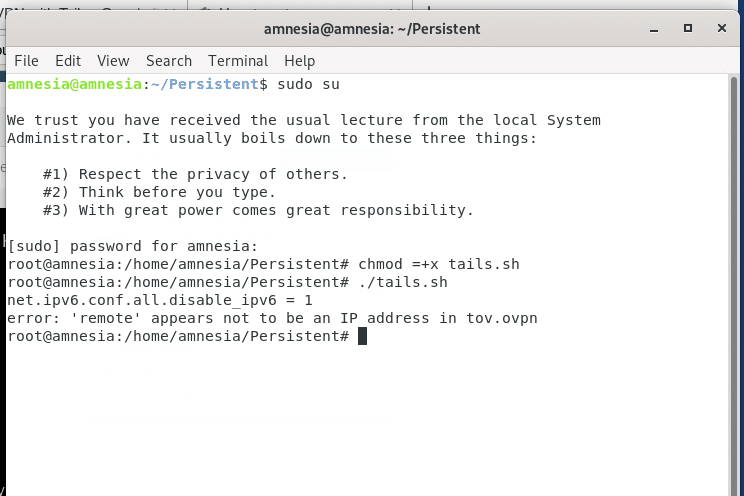
- Enter the command chmod +x tails.sh to set the execution rights.
- Run the tails.sh script file with ./tails.sh
- Enter your username and password to authorize the VPN connection.
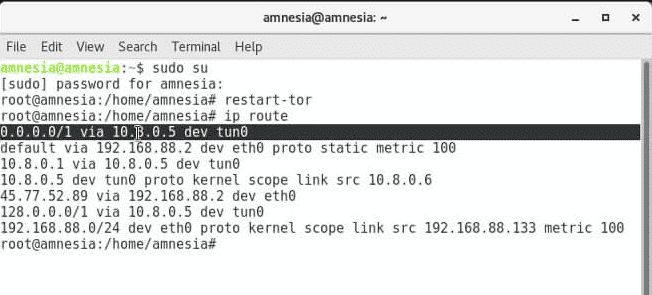
- Upon successful completion, restart Tor and make sure it works by entering the relevant commands.
Method 2
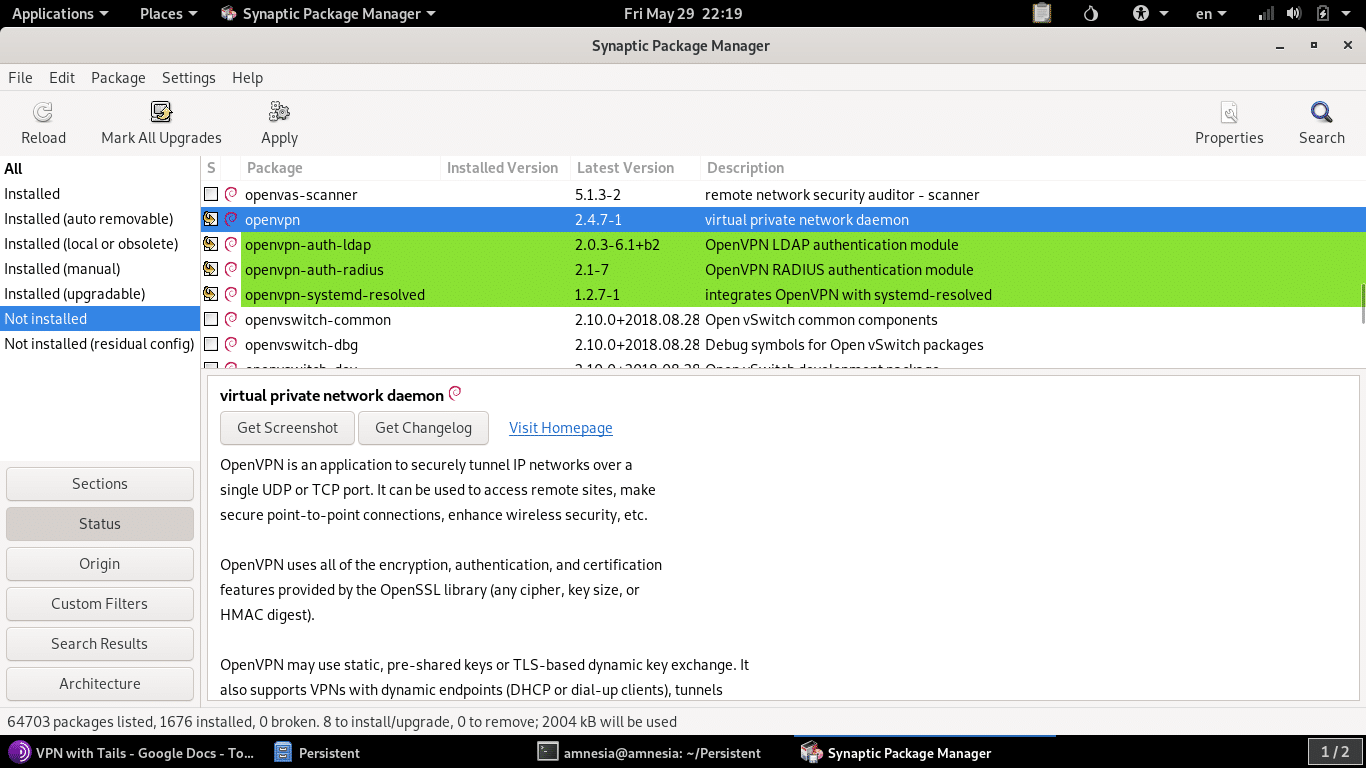
- Open the Synaptic Package Manager.
- Search for OpenVPN under the “Not Installed” tab.
- Check all the packages and mark them to be installed.
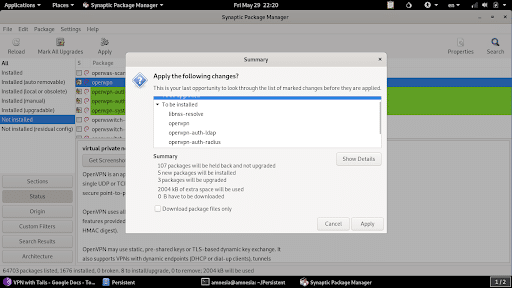
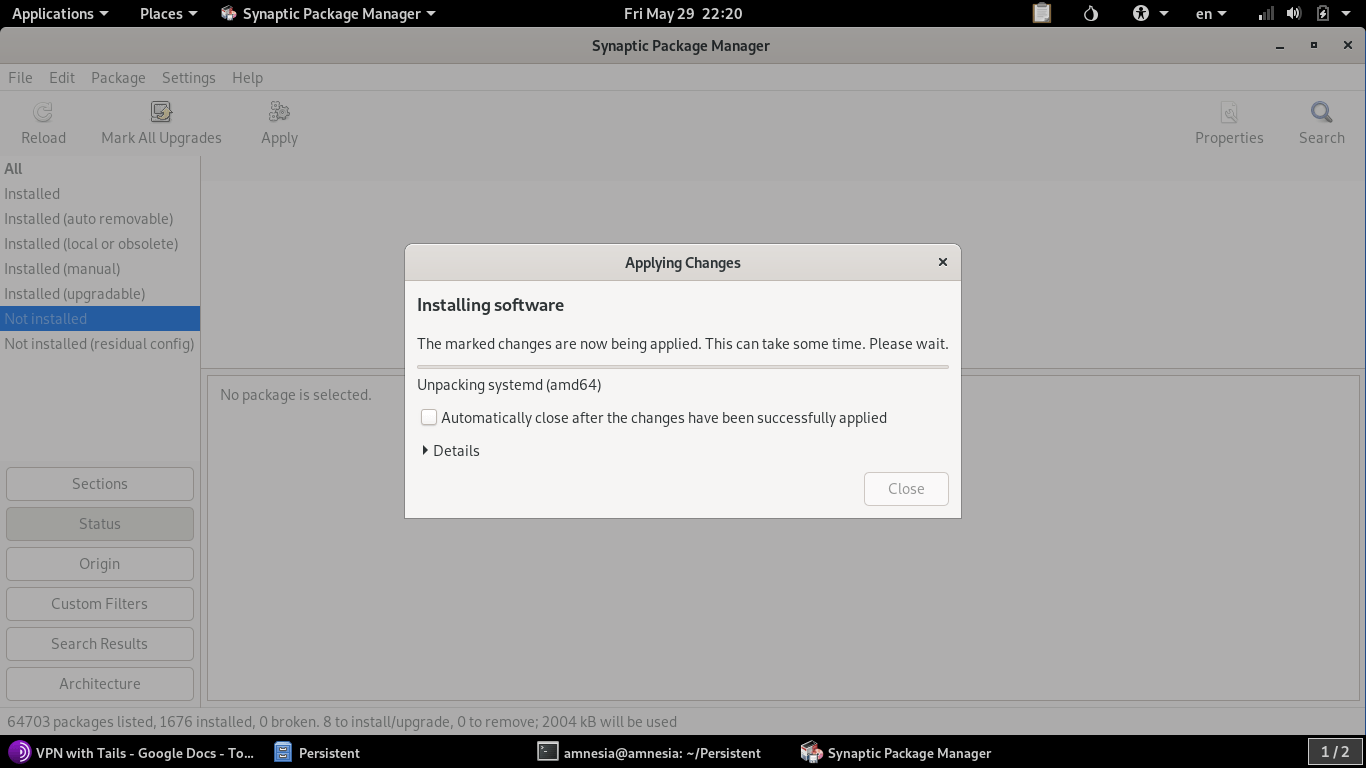
- Apply the changes.
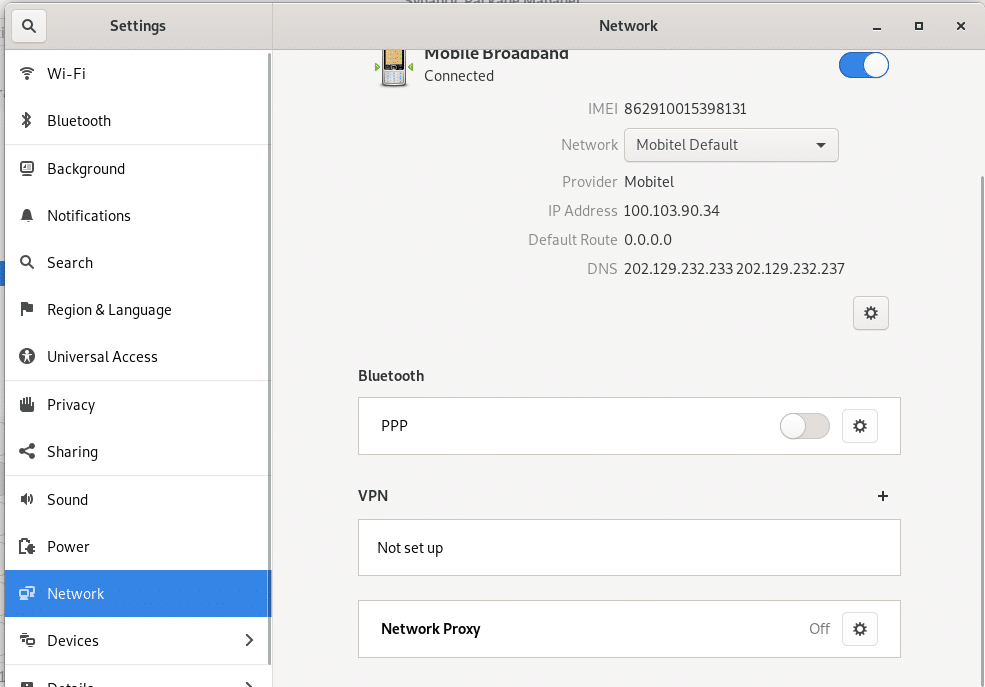
- Configure your VPN.
- Add the configured ovpn file to the VPN in the network settings.


Thank you for your sharing. I am worried that I lack creative ideas. It is your article that makes me full of hope. Thank you. But, I have a question, can you help me? binance тркелгсн жасау